 Now move to the
other side of the camera. Disconnect the spring as shown in the photo.
Now move to the
other side of the camera. Disconnect the spring as shown in the photo.  Unscrew and remove
the post that the spring is attached to.
Unscrew and remove
the post that the spring is attached to.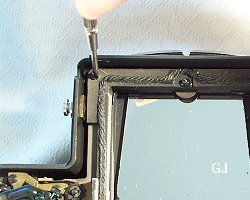 Next unscrew the
screws around the screen area. Top left.
Next unscrew the
screws around the screen area. Top left. PENTACON six TL disassembly - Part 6
Please Note: The PENTACON six TL can be a rather delicate piece of precision mechanics. If you are not comfortable with attempting to take one apart for repair/maintenance please take it to a repair centre. These pages are to be used as a guide only. I will not be responsible for any damage caused to cameras due poor workmanship.
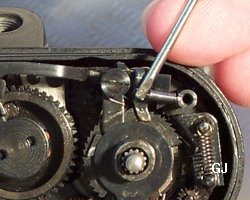
Now move to the
other side of the camera. Disconnect the spring as shown in the photo.
Unscrew and remove
the post that the spring is attached to.
Next unscrew the
screws around the screen area. Top left.
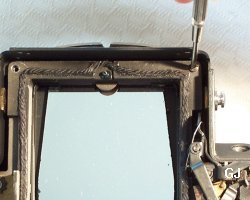 Top right.
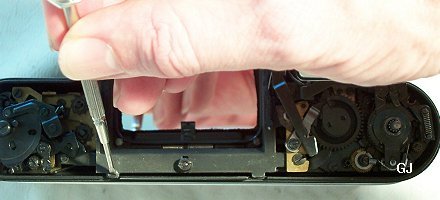 Then the one at
the bottom.
Then the one at
the bottom.
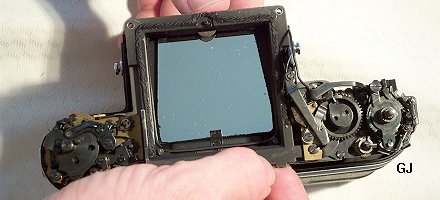 Carefully push
under the mirror and the whole chassis should rise out of the body shell.
Carefully push
under the mirror and the whole chassis should rise out of the body shell.
Go to the "Inside a PENTACON six TL" page to see what the chassis looks like out of the camera body.
Reassembly
Basically it is the reverse of the instructions given so far, however there
are a few parts to look out for.
Also do not over tighten any screws as it is quite easy to strip the
threads (don't ask how I know this).
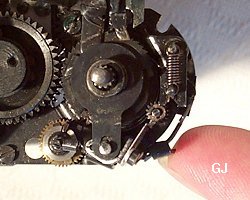
 The first thing
to look out for is a latch located on the body shell.
The first thing
to look out for is a latch located on the body shell.
This latch will need to be held as shown as the chassis is lowered back into the
shell.
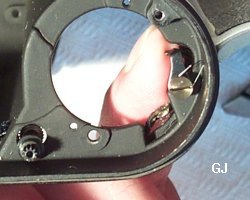
 The other thing
to look out for as you lower the chassis is the spring shown here.
The other thing
to look out for as you lower the chassis is the spring shown here.
It will need to be pushed back to allow the chassis to be fully lowered.
Also make sure the spindle for the film counter slots into the correct place.
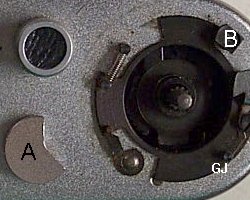 Care is also needed replacing the top plate.
Start by opening the film door. As the
top plate is replaced the latch (A) under the winder needs to be held back.
I have removed the frame counter dial in this photo to show the position that
the stopper (B) should be in when tightened.
It is recommended not to remove the frame counter dial as you will only make
more work for yourself.
This page was created on Thursday 15th January 2004