Polishing a blade.
Due to the increase in popularity of monosteel blades I have decided
to add these few pages on how I go about polishing my blades.
NOTE: These techniques should NEVER be used on an antique Nihonto
(Japanese sword).
Nihonto should be polished by a skilled professional, as there is
more to polishing them than just sharpening them and making them shiny.
Unfortunately too many swords are damaged when people, unfamiliar
with traditional polishing, try to "clean the blade up" themselves.
Modern metal polishes are not suitable either as the tend to burnish
the steel and obscure the grain in the blade and remove the temperline.
If you have a Nihonto, keep it well oiled to prevent it from rusting.
If you want to get it polished, remember, you usually get what you
pay for.
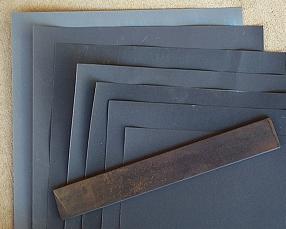 I use wet and dry abrasive paper (The above photo shows the flat piece
of steel that wrap the paper over with 400, 600, 800, 1000, 1200, 1500
and 2000 grade papers). Theses papers come in roughly A4 size, so
I cut each one into four then fold the pieces in half lengthwise and place
the flat piece of steel in the centre. I have noted different tolerences
between manufacturers, recently I bought some 320 grade paper made in W.
Germany that seemed to act more like 600 of the paper I normally use.
I use wet and dry abrasive paper (The above photo shows the flat piece
of steel that wrap the paper over with 400, 600, 800, 1000, 1200, 1500
and 2000 grade papers). Theses papers come in roughly A4 size, so
I cut each one into four then fold the pieces in half lengthwise and place
the flat piece of steel in the centre. I have noted different tolerences
between manufacturers, recently I bought some 320 grade paper made in W.
Germany that seemed to act more like 600 of the paper I normally use.
Firstly I sharpen the 1mm blunt edge with 120 grade belt in a belt
sander. Whilst doing this I frequently stop and touch the blade to
ensure that it doesn't get too hot and destroy the hamon, if I suspect
it is getting too hot I will soak it in water, then wipe the water off
before I continue sanding with the belt sander.
This polishing is done dry, as it's an electric sander.
From here on all the abrasive papers are applied wet. The
blade is frequently wiped clean before water applied.
I start with 220 grade wet and dry paper and polish along the length
of the blade working the entire length to remove any wobbles left by the
belt sander.
Then I polish at about 60 degrees to the edge with 320 grade.
To define the ridge a bit better I polish the top section and the lower
section at different angles. Polishing is done until the 220 lines
have gone.
After that I will change to 400 grade and polish at right angles to
the 320 grade finish.
If you are polishing a blade that has bad surface rust this is probably
a good grade to start with.
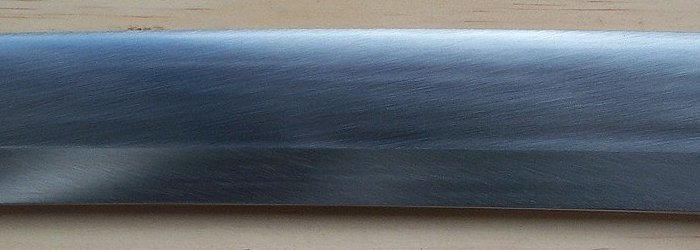
This photo shows one of my blades polished with 400 grade paper.

Here is the blade polished with 600 grade wet and dry. Although
the photo is a bit too bright you can see the change in angle from the
400 grade.
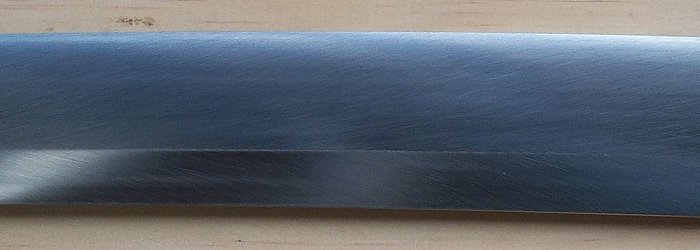
This is the blade polished with 800 grade wet and dry paper, once again
it was polished until the 600 grade lines had gone.
[NEXT]
This page was created Monday 2nd July 2001